Measurement presets
Sept 15th, 2026
Most estimators lose the first twenty minutes of a job to setup. You choose the measurement type, set the units, enter the depth, and pick a color that won't be confused with the scope sitting next to it on the sheet. Then the next job starts and you do all of it again from memory.
Struction now lets you save that setup and reuse it. A preset is a named configuration holding the measurement type, units, depth and slope defaults, how the measurement appears on the sheet, and any outputs derived from it. Arming a preset loads all of that into the tool at once.
WHAT IT DOES
What a preset holds
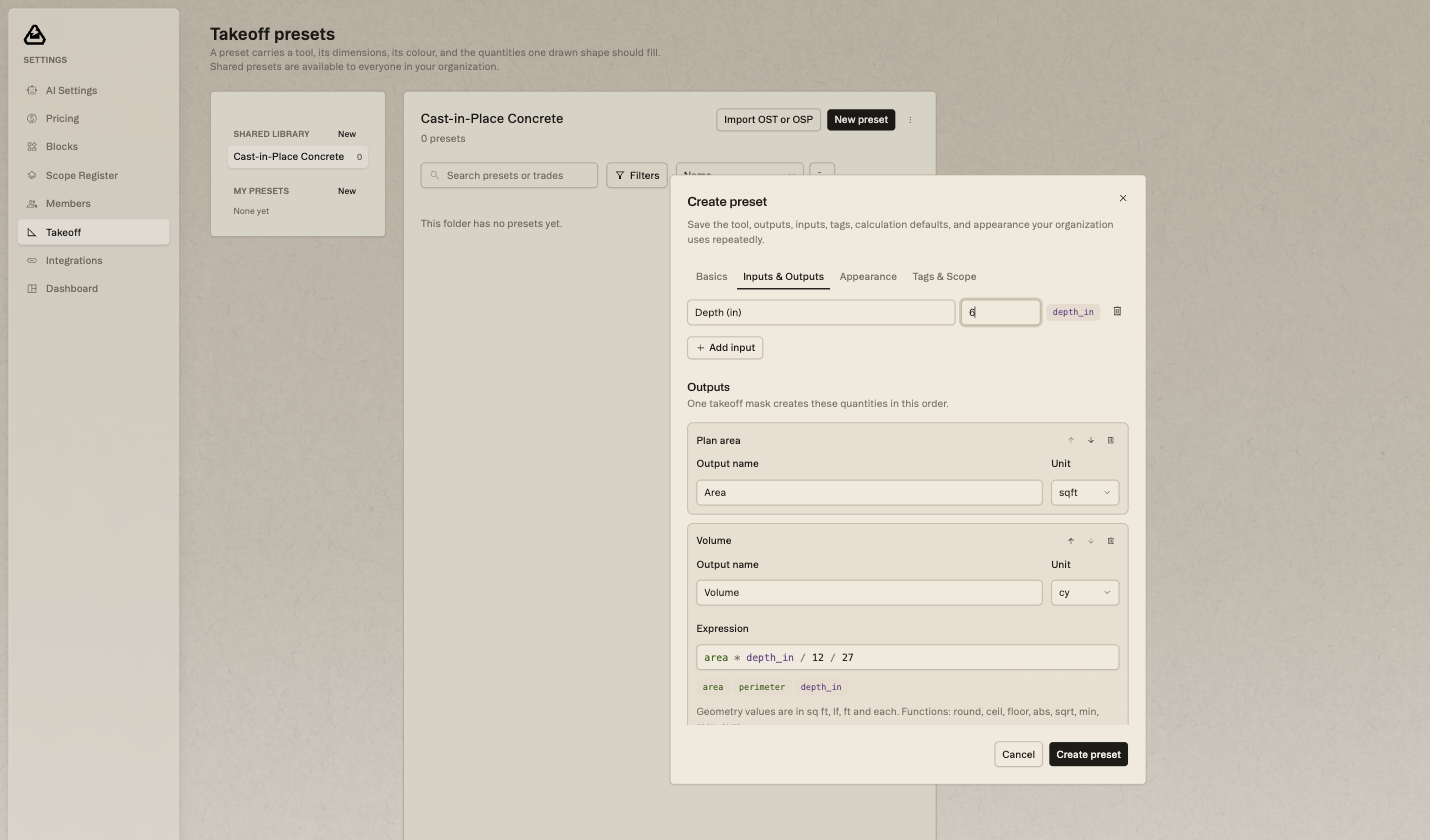
Say you build a preset for a six-inch slab. You configure it once as an area measurement, enter the depth, and add volume as a derived output. From then on, arming that preset gives you an area tool already set to six inches that returns both the area and the volume, with nothing left to configure.
The preset button sits in the toolbar alongside the takeoff tools, and Option+X opens it if you'd rather stay on the keyboard. The palette is available while you're focused on a single sheet as well, so you can switch presets without leaving the drawing you're working on.
A shared library, organized by trade
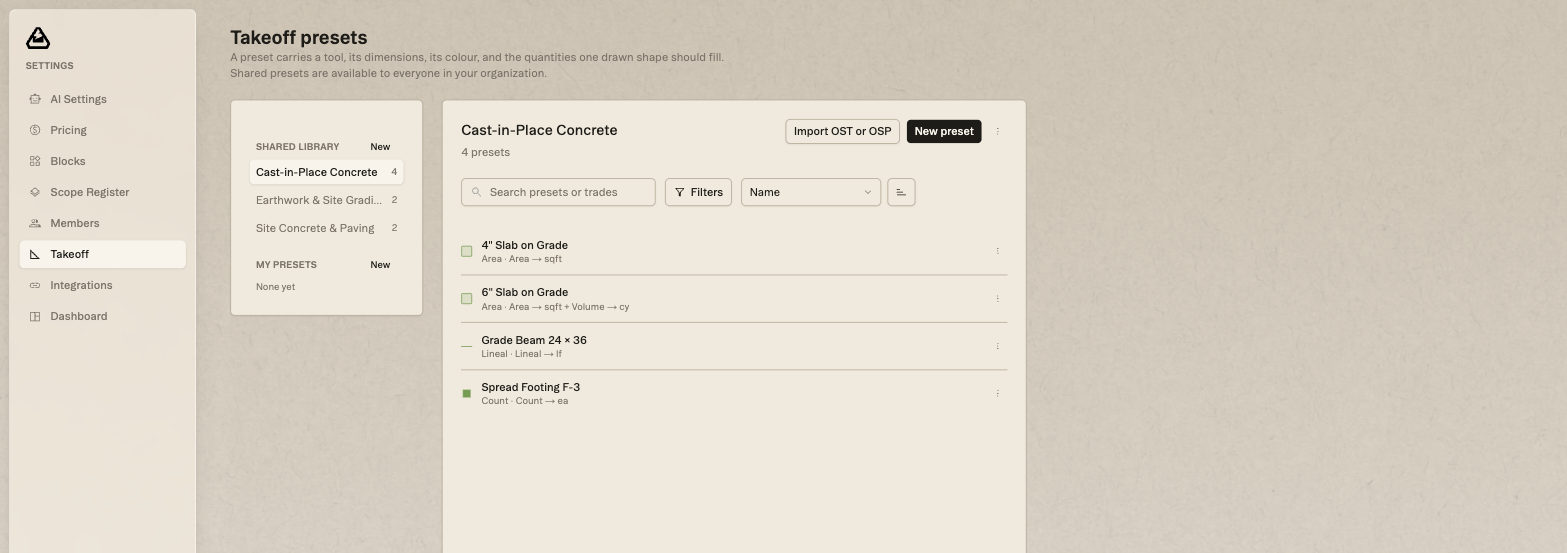
Presets are organized into folders, and the library is shared across your organization. The library screen describes its job plainly: it manages the trade-foldered presets available to your organization. In practice that means folders matching the way your bid packages are already split, so concrete sits with concrete and earthwork with earthwork.
The library has two halves. Shared Library holds the presets your whole team can arm and edit. My Presets holds your own, which is where a preset can live while you're still refining it and don't want it in front of everyone yet. You can create a folder in either from the same screen.
You can search the library by preset name or by trade, sort what comes back, and click into any preset to edit it.
WHY IT MATTERS
Why the setup is worth saving
The value here has less to do with the twenty minutes than with consistency. Setup isn't the skilled part of a takeoff, but it is the part rebuilt from memory on every job by whoever picks up the package, and small differences accumulate.
One estimator builds a six-inch slab as an area with the depth set on the measurement. Another builds the area and adds a separate volume line afterwards. A third forgets the depth entirely and either catches it at review or doesn't. None of these reads as an error at the time, but together they produce quantities that can't be compared cleanly between jobs, and a carry price whose basis depends on who happened to build it.
A preset moves that method out of individual memory and into something the company owns. The same takeoff runs the same way in September as it did in March, whoever is running it. It also turns out to be a useful onboarding tool, since a new estimator arming your shared library is working to your standards from the first day without anyone having to sit down and explain what they are.
ALSO NEW
Where the numbers end up
A preset decides how a quantity gets measured. The project-wide Quantities panel is where those quantities end up, listed together with the sheet each one was taken off and grouped by package so you can read the job by trade.
The two work as a pair. The preset makes the method consistent, and the panel lets you check the result against the drawing it came from.
HOW TO
Building your first one
- Open the preset library from the toolbar, alongside the takeoff tools. Option+X does the same thing from the keyboard.
- Create a folder before anything else. The library asks for this first, and folders work best when they match the bid packages you already use instead of a separate classification you'd have to explain to people.
- Add a preset and configure it the way you would configure the tool by hand: measurement type, units, depth or slope, and how it should appear on the sheet.
- Add any derived outputs. An area that should also return volume carries that as part of the preset, so nobody has to remember the second step later on.
- Arm the preset from the toolbar or from the palette while you're on a sheet, then take off as you normally would.
- Edit a preset by clicking it when a standard changes.
One piece of advice worth following: build the five presets you use on every job before you build the fifty you might use once. A library that covers everything but takes a search to navigate tends not to get opened.