Regroup and scope a whole floor of takeoffs at once
Nov 2026
Bulk edit
Forty rooms, each saved as its own quantity
Auto room outlines every room on a floor plan in one pass and saves each one as its own quantity: Room #55, Room #57, Room #58 and so on. That’s the right starting point, but it isn’t how you price the job. Flooring wants the classrooms on one line and the corridors on another, and every one of those lines needs a scope before it means anything in the estimate.
Getting there used to mean going through the rooms one by one: rename, move, link a scope, repeat. On a school floor with forty-odd rooms, that’s a long stretch of clicking before you’ve priced anything. We heard about that friction on customer check-ins this fall and built a way around it. You can now select every takeoff that belongs together and change them in one step.
Selecting
Build the selection on the drawing
- Open the sheet in focus view and make sure the Select tool is active in the bottom toolbar.
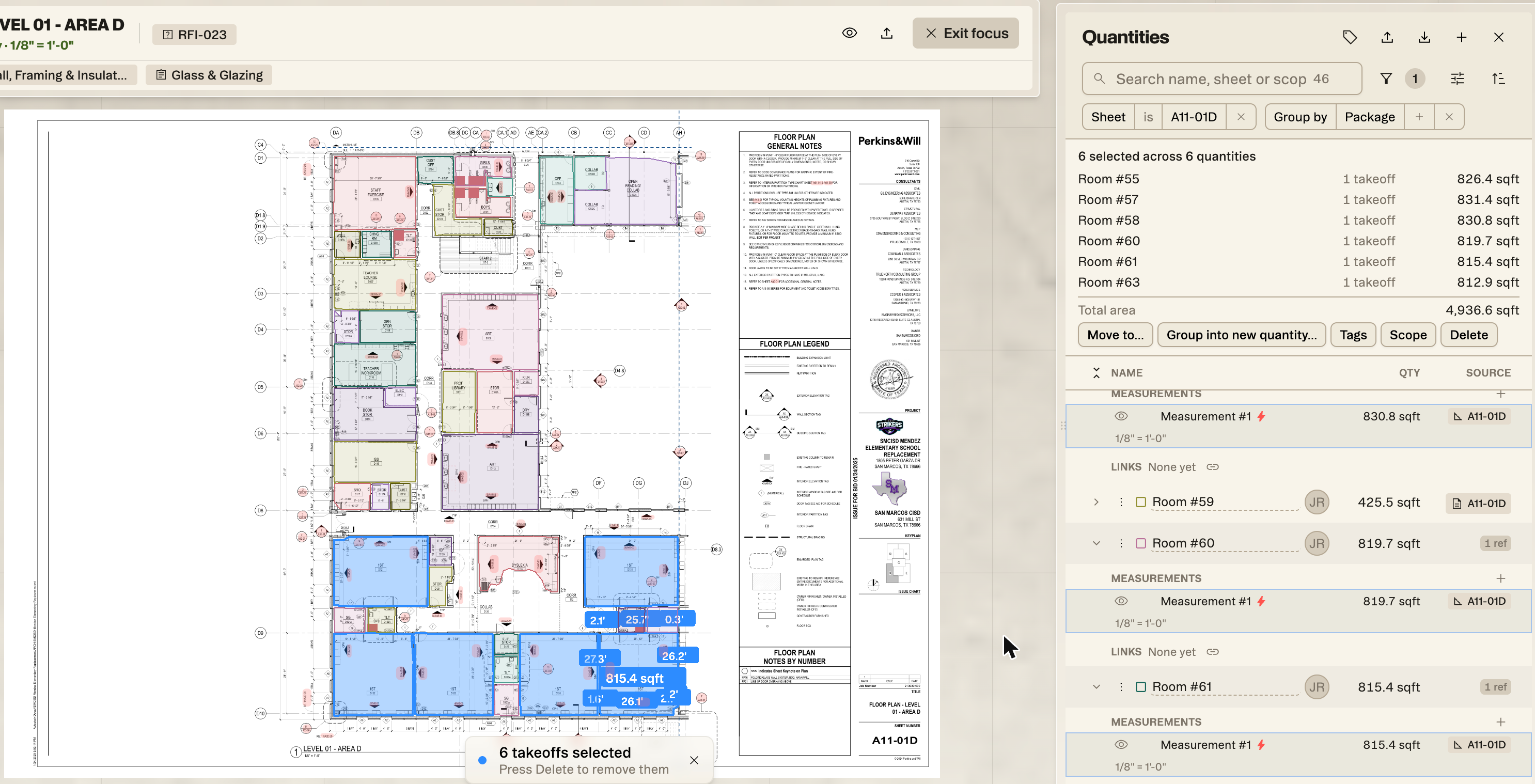
- Click the first takeoff, then hold Shift and click each of the others. They turn blue, and a card at the bottom of the sheet keeps count.
- Open the Quantities panel. A summary now sits above the list showing which quantities your selection comes from, how many takeoffs are in each, and the combined total.
The selection can span as many quantities as you like, which is the usual situation after an Auto room pass. The summary lists each source quantity on its own line, so you can check you’ve caught the right rooms before you change anything.
Changing them
Group them into one quantity
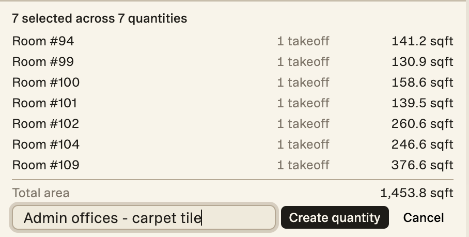
Group into new quantity is the one you’ll use most. It asks for a name, creates the quantity and moves everything you selected into it. Move to does the same job when the destination quantity already exists, and it only offers quantities of the matching type, so an area won’t land in a count by mistake.
More actions
Scope, tags and delete
Scope links every quantity in the selection to a scope of work. You can pick one already on the project or pull one in from your firm’s scope register, and anything already linked is left as it is. Tags applies tags that already exist in the project, and Delete, or the Delete key on the sheet, removes the selection.
One behavior to keep in mind: a takeoff carries its new quantity’s scope, not its old one. If you move rooms out of a scoped quantity into an unscoped one, they’ll show as unassigned until you scope the new quantity.
Worked example
The front office, ready for the flooring sub
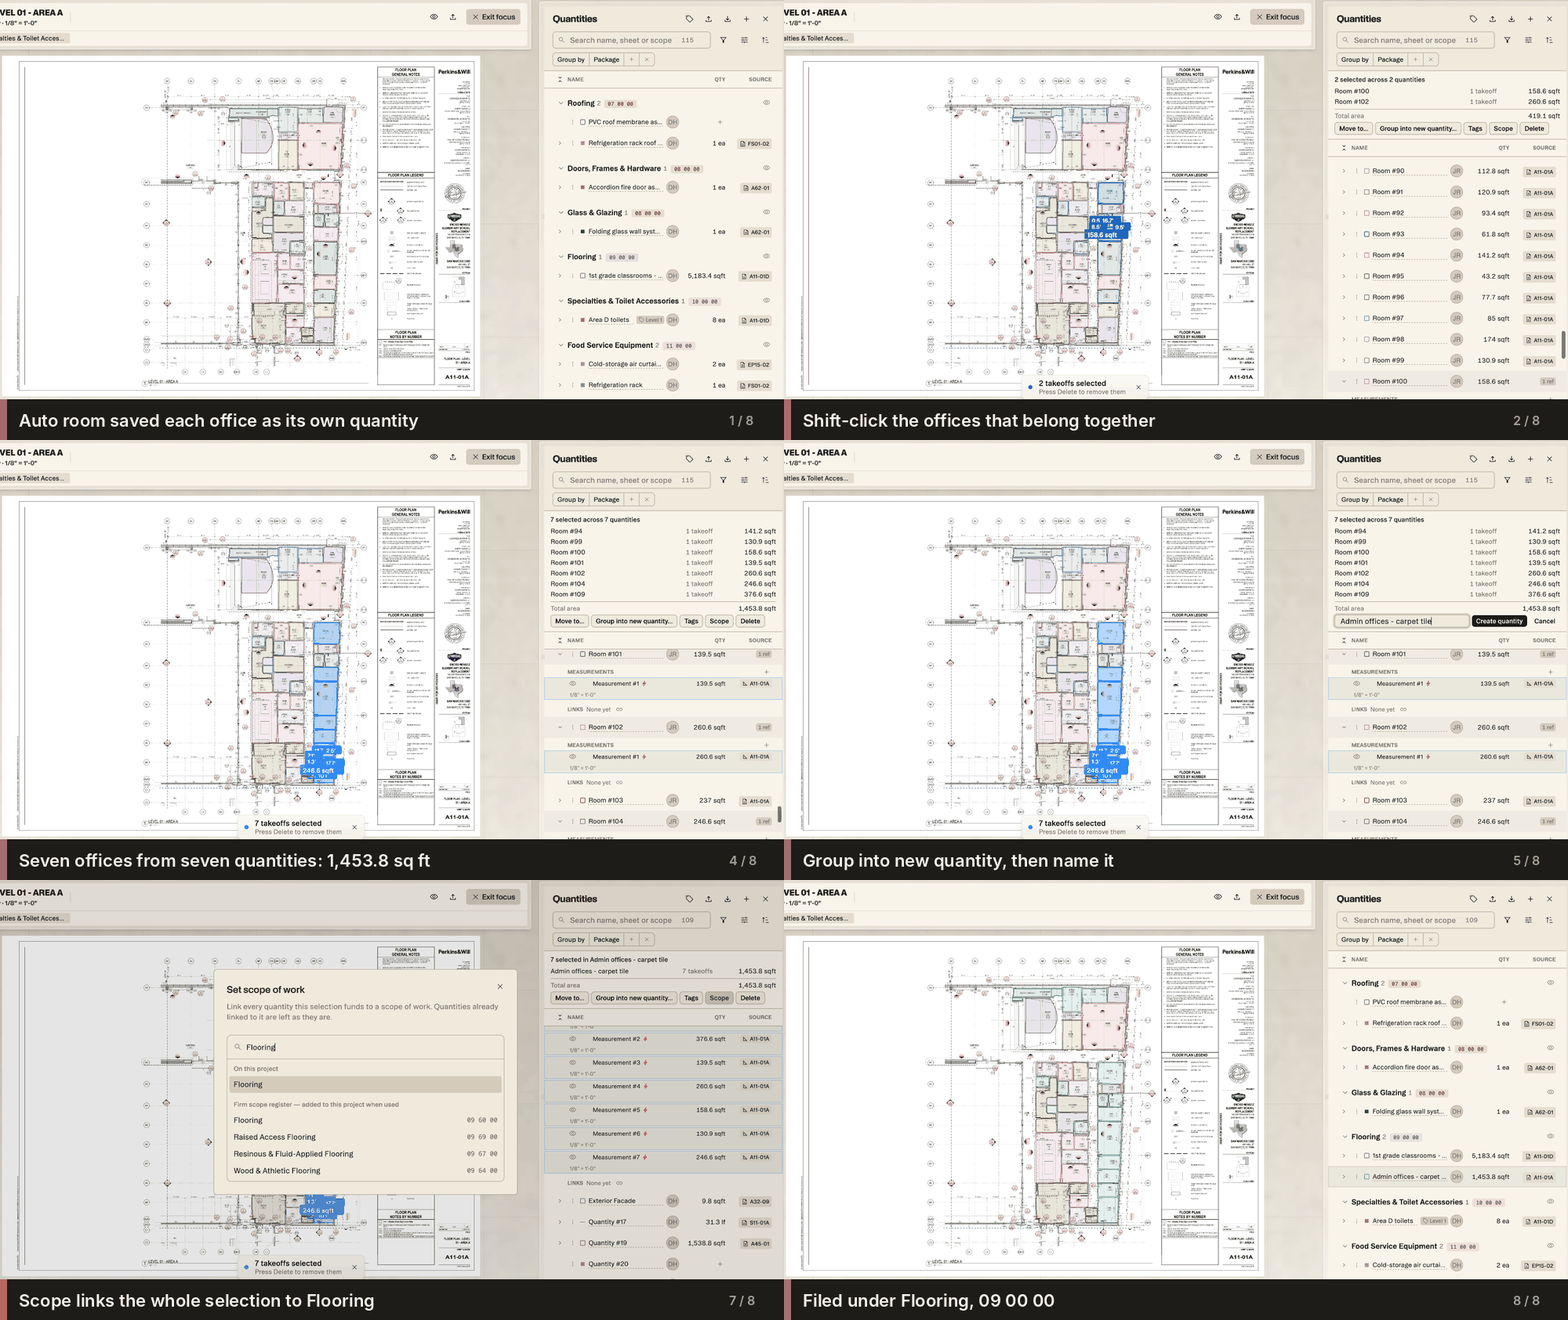
On A11-01A, the Area A floor plan of an elementary school in one of our test projects, an Auto room pass had saved every room in the administration wing as its own quantity. We wanted the seven offices along the east side, from the counselor’s office down to the principal’s, on one line for a carpet tile price.
We shift-clicked the seven offices, chose Group into new quantity and named it Admin offices - carpet tile. Then we used Scope and picked Flooring. After a reload, the panel filed it under Flooring, 09 00 00, with 1,453.8 sq ft across all seven offices and their sheet references intact.
Done room by room, the same result is seven moves and seven scope links. Bulk edit made it two actions, and the count stays at two no matter how many rooms you select.
Related
Start with an Auto room pass
Bulk edit works on any saved takeoff, whether you drew it or a tool found it, but it saves the most time on the dozens of rooms an Auto room pass produces. The Auto room post walks through that pass from picking the tool to saving the rooms.
Put it against a real set.
Upload one project free with a work email. Struction reads the drawings, drafts the scopes trade by trade, and keeps every line pointed back at the sheet it came from.
Upload a set →